I've always been fond of E-ink screens. I really like the way they look. I feel like they feel a lot more "physical" than LED screens. I've always wanted to make some sort of thing that can sit in my room to provide some sort of status update. Ideally, it would be a form of calm technology.
So, when I had just enough prize money from a hacking competition at my school to buy this Raspberry Pi 2 W, I just had to buy this Waveshare 2.13" E-Ink Display HAT to go with it.
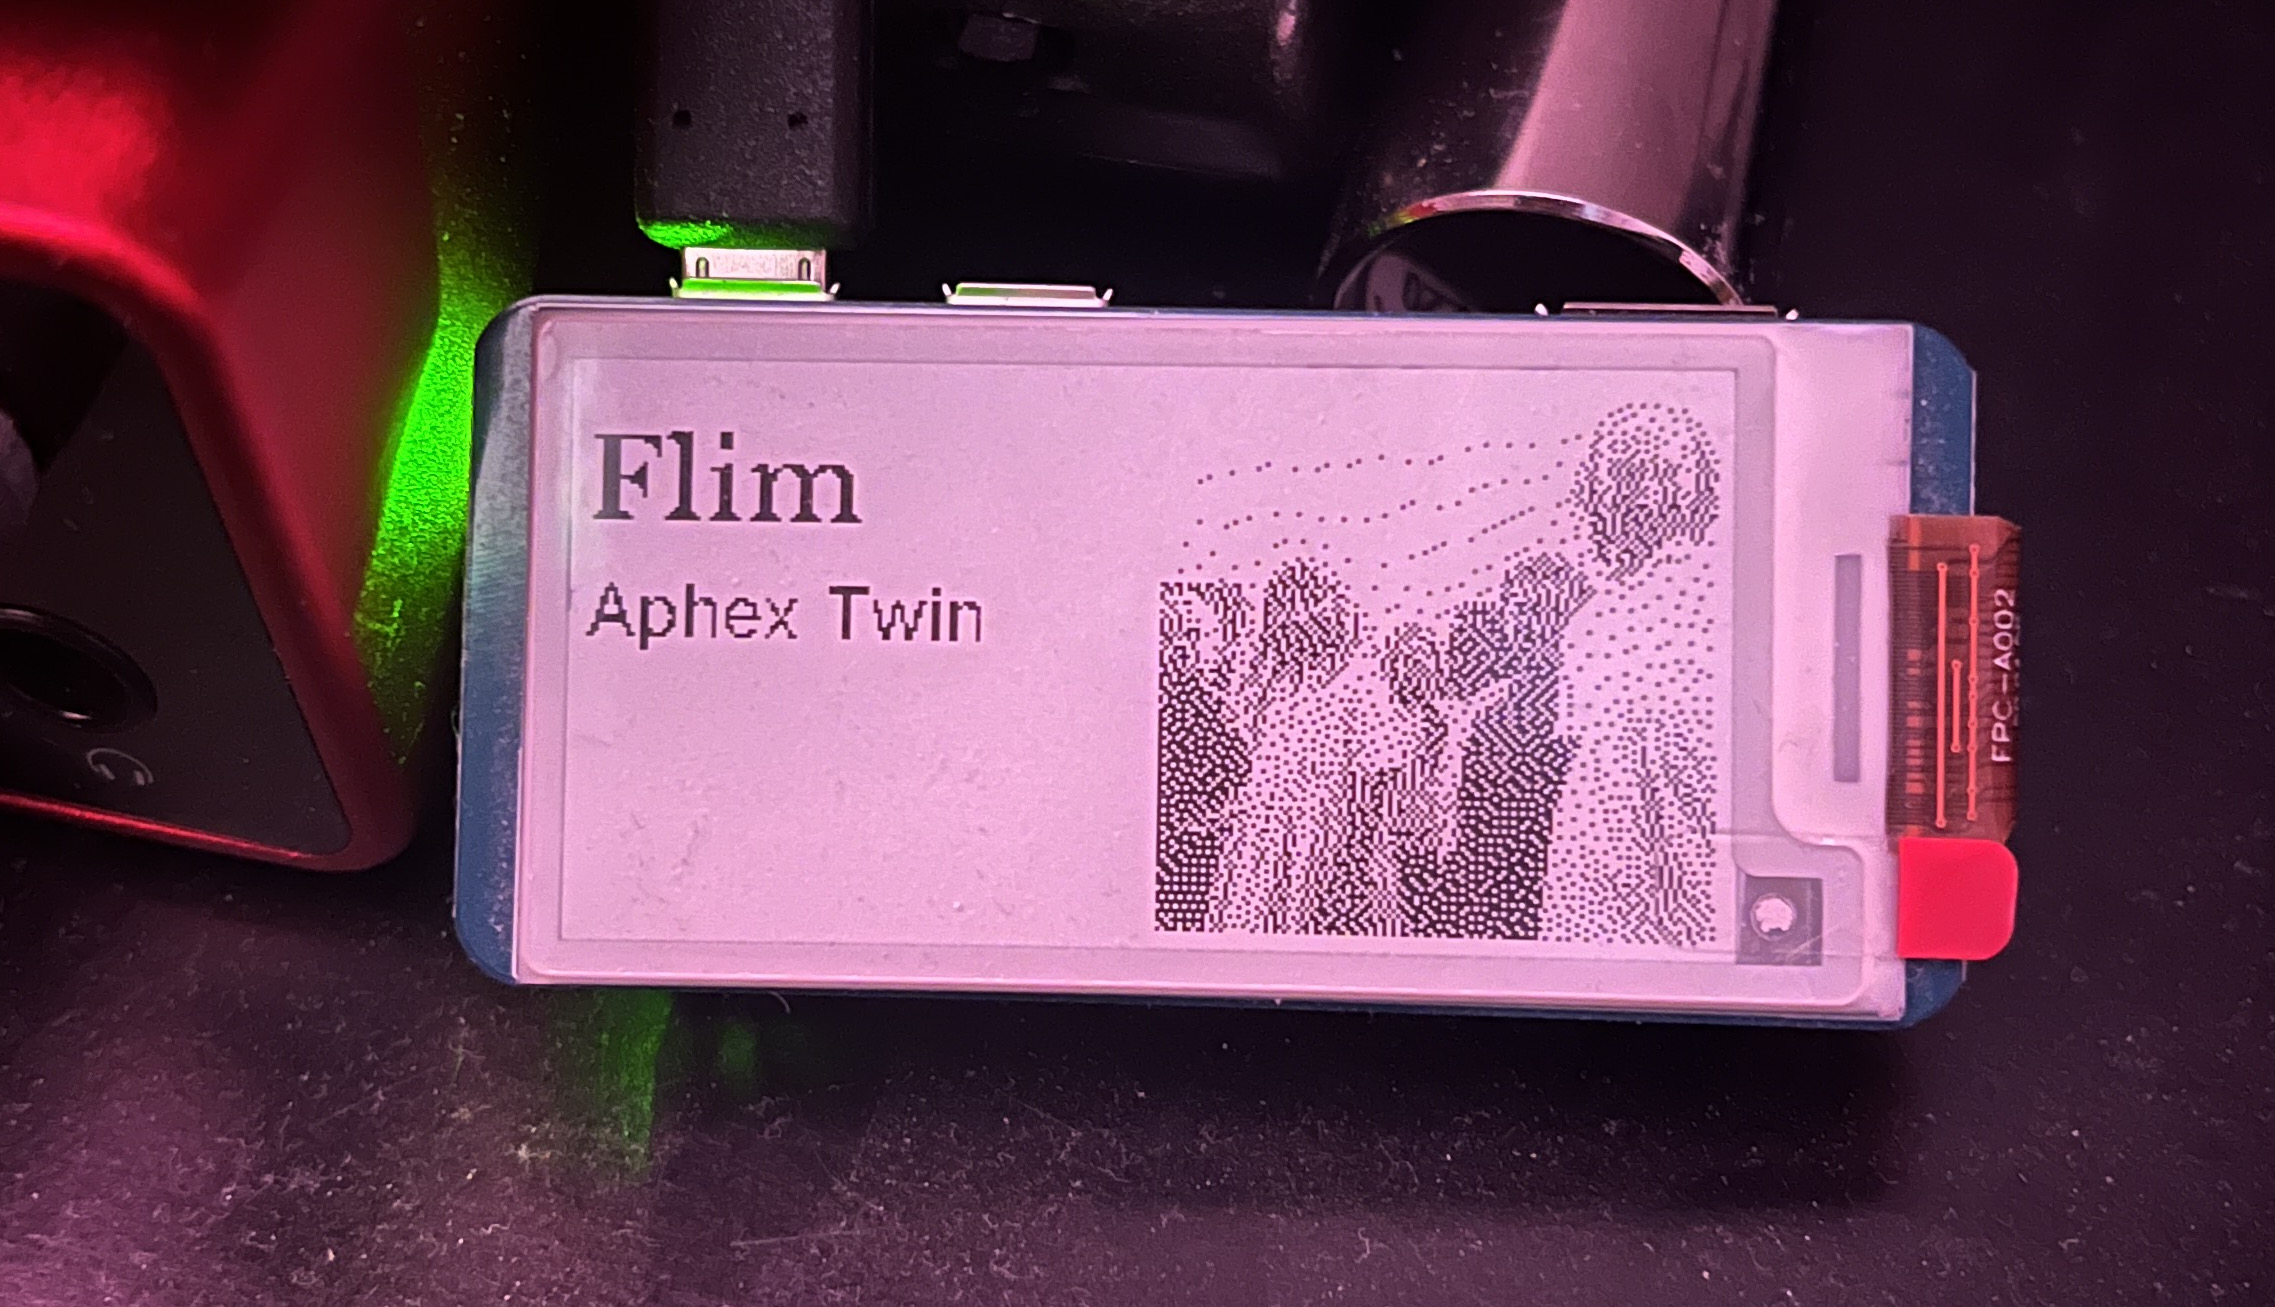
After gathering these materials, I... let them sit on my desk for forever. It was probably a combination of procrastination + not knowing exactly what to display on the screen. After some time, I finally decided I needed to do something with this Pi or sell it. So, I decided to make a Spotify bot that would display the track you are currently listening to.
I named the project after Tars from Interstellar, despite the egregious disparity between the actual TARS and my little bot you see here.Here is the result (it hangs up now and then, but it works pretty consistently):
In this post I'm going to cover the setup of the actual Raspberry Pi and screen, since this was actually the hardest part. My approach was largely adapted from this very helpful blog post on the same topic.
Materials
All materials added up to a total cost of ~$56:
- Raspberry Pi 2 W($22)
- Waveshare 2.13" E-Ink Display HAT($23)
- 40 Pin Male Pin Header($4). The Raspberry Pi I purchased did not come with the GPIO pins, so I had to buy these and have my friend solder them on (since I am not good at soldering). The alternative was to buy pins that required an $18 press to install and I really did not want to do that.
- SanDisk Ultra 16GB Micro SD Card($7)
- A random micro-usb cord for power (free!)
Connecting to WiFi
I had some issues at first when trying to connect the Pi to my WiFi network. I tried imaging the Pi with WiFi credentials using pi imager, but that didn't work. Then, I tried manually creating wpa_supplicant.conf to no avail:
ctrl_interface=DIR=/var/run/wpa_supplicant GROUP=netdev
update_config=1
country=US

network={
     ssid="my-SSID"
     psk="my-password"
     scan_ssid=1
}
Luckily, I had a POE converter laying around. I hooked it up to power and connected the converter directly to the router. I was finally able to SSH in. Startup showed me this message:
Wi-Fi is currently blocked by rfkill.I'm not sure why this happened, it was probably some sort of skill issue. When I ran ip addr, the wlan0 interface seemed to be down:
3: wlan0: <BROADCAST,MULTICAST> mtu 1500 qdisc noop state DOWN group default qlen 1000Additionally, rfkill showed the following output:
ID TYPE      DEVICE    SOFT      HARD
 0 bluetooth hci0   blocked unblocked
 1 wlan      phy0   blocked unblocked
After a few google searches, I stumbled upon this StackOverflow answer that recommended setting the WiFi country by running sudo raspi-config. This solved the issue.
(Additional Note: The WiFi chip on the Raspberry Pi Zero W only operates on 2.4GHz. I had reconfigured my WiFi to have a 5GHz netowrk and had trouble reconnecting afterwards. I had to bust out the PoE converter again and edit wpa_supplicant.conf to connect to my 2.4GHz network.)
Prerequisites/Setup
I initially used the official Waveshare documentation to get started and install dependencies, but I ended up taking some liberties along the way.
Enabling the SPI Interface
Enable the SPI interface via raspi-config. Verify that it is enabled using the following command:
cat /boot/firmware/config.txt | grep spi
# This should output "dtparam=spi=on"
Repo Cloning & Setup
Clone the Waveshare repository for the display:
sudo apt install git
git clone https://github.com/waveshareteam/e-Paper.git
Create a venv for the project and activate it:
sudo apt update
sudo apt upgrade -y
sudo apt install python3-pip
mkdir ~/haiku-bot
cd haiku-bot
python -m venv venv
source venv/bin/activate
I spent a bunch of time figuring which dependencies you actually need, since the official documentation and the guide that I was following list different dependencies. Here is what worked for me (lgpio proved to be the missing pieces for me):
pip install spidev gpiozero pillow lgpioCleaning up the code
Upon cloning the repo, you'll likely notice that the code is super disorganized and confusing. If your dependencies are installed properly, however, the epd_2in13_V4_test.py script should work for the 2.13" display.
I started by cleaning up the root directory structure to the following:
.
├── pic
├── examples
├── lib
├── epd_2in13_V4_test.py
└── venv
This involved getting rid of all the other drivers for different hardware (Arduino/, Arduino_R4, E-paper_Separate_Program, STM32, etc.).
I also cleaned up the waveshare_epd directory by moving all of the other libraries for different displays into waveshare_epd/misc. I also made sure to include the epdconfig.py in the directory since our display library depends on it.
lib/
└── waveshare_epd
    ├── epd2in13_V4.py
    ├── epdconfig.py
    ├── misc
    └── __pycache__
Conclusion
Once you have your epd_2in13_V4_test.py working, you should be good to start drawing on the screen! More on that in part 2.
The setup.py is weird to install the display library as a python module, so I just decided to access the library using the following syntax:
from lib.waveshare_epd import epd2in13_V4